Image Map

Sunday, December 25, 2011

Merry Christmas with Creamy Brown Sugar Fudge

Merry Christmas everyone! Today we have the 25th recipe in 25 days, wow! I’m a little surprised I made it, but it’s been great and with so many new recipes under my belt I’m sure next year’s baking will be a breeze. The following recipe takes a little bit of time, but it is so worth it! I hope your Christmas is wonderful and full of fun! See you soon :)
Creamy Brown Sugar Fudge

Look out for the large amount of sugar below!

2 cups              packed brown sugar
1 cup               granulated sugar
1 cup               whipping cream
3 tbsp              corn syrup
2 tbsp              unsalted butter
¼ tsp               salt
Pinch               baking soda
1 tsp                vanilla

Grease bottom and side of a large heavy saucepan. Add brown and granulated sugars, cream, corn syrup, butter, salt and baking soda; stir over medium-low heat until melted.

Bring to boil over medium heat. Boil, without stirring but brushing down side of pan with pastry brush dipped in cold water, until candy thermometer reaches 234˚F (112˚C), 12-14 minutes,  or softball stage (when 1 tsp dropped into cold water forms soft ball).

Dip bottom of saucepan into cold water for 1 minute. Let cool, undisturbed, on rack until lukewarm, 30 to 45 minutes.

With wooden spoon or in stand mixer with paddle, beat in vanilla; beat until thickened and just beginning to lose its gloss, 4 to 5 minutes.

Immediately scrape into parchment lined 8-inch square cake pan, spreading evenly. Let cool in pan until set, about 30 minutes.

Remove from pan. Using knife dipped into hot water, cut into 1-inch squares.

xox

** I totally forgot to post this, and to take a photo! I hope everyone had a great Christmas, I will be away for a couple days and will share a photo and my favourites when I get back :)

Saturday, December 24, 2011

Gingersnap Cookies


Gingersnap Cookies (I like these instead of cut-out gingerbread, partially because I'm lazy)
(gluten and nut free)

⅓ cup              unsalted butter, softened
1⅓ cup            granulated sugar
1                      egg
¼ cup              fancy molasses
2½ cups           gluten-free all purpose baking flour
1½ tsp             ground ginger
1 tsp                baking soda
1 tsp                ground cloves
1 tsp                ground cinnamon
Pinch               salt

In a large bowl beat butter with 1 cup of the sugar; beat in egg and molasses. In a separate bowl, whisk together baking flour, ginger, baking soda, cloves, cinnamon and salt; stir into butter mixture to form stiff dough.

Roll dough by level 1 tbsp into balls; roll in remaining sugar. Place, 2 inches apart, on parchment lined baking sheets; press to flatten slightly.
 

Bake in 350˚F oven until edges are light golden, about 12 minutes. Transfer to rack, let cool.

I actually didn’t use gluten-free flour, and I think because of that my cookies rose (my auto correct tried to tell me raised... you decide) more than they were supposed to. But as Reggie said, they still taste good, so no worries! But if you require gluten-free, this is a simple and tasty recipe! Day 24, oh my goodness we’re getting so close, I can almost see it! One more sleep! Sleep well everyone :)

xox

Friday, December 23, 2011

Sugar Cookies with Royal Ornamental Frosting

Doesn't that cookie look good! Head on over to Karen's blog, Hodgepodge Arty for the complete how-to on this cookie. I'm not a big fan of making cut-out cookies, so when Karen offered up this recipe I jumped on it!

Only two sleeps left, and... it snowed last night! It might not be a green Christmas afterall :)
xox

Thursday, December 22, 2011

Oatmeal Chocolate Chip Shortbread


Oatmeal Chocolate Chip Shortbread

1 cup               unsalted butter, softened
3 tbsp              each granulated sugar and packed brown sugar
¼ tsp               salt
½ tsp               vanilla
1¼ cup            all-purpose flour
¾ cup              quick-cooking (not instant) rolled oats
¼ cup              cornstarch
¾ cup              chocolate chips

In a bowl using a wooden spoon, cream together butter, granulated sugar, brown sugar and salt until light; stir in vanilla (I used my stand mixer, worked fine). Stir in flour, oats and cornstarch until just combined. Gently fold in chocolate chips.
Divide dough in half; place each on waxed paper and using paper as aid, roll into 9” log. Refrigerate until chilled, about 1 hour, or for up to 24 hours.
Using a serrated knife, cut each roll into18 pieces; place, about ½ inch apart, on parchment lined baking sheet. Bake in 275˚F oven until firm and bottoms are lightly browned, 40-45 minutes. Let cool on pan on racks.
I tried these when they were still warm, and I found that I preferred them once they had cooled completely. I also used large chocolate chips, because it was all I had. But I think it would work better with mini chips (or without would be good too!). 
And that is day 22, I can’t believe how close it is to Chirstmas! We finally have our tree up and decorated, and the presents are constantly multiplying underneath – I’ll share a photo soon! I hope your holiday baking is coming along :) If you'd like to know how to make your own goodie box, check the tutorial page above and click on the first one!

xox

Wednesday, December 21, 2011

Relax


This time of year it can be really difficult to find time to relax! My body is great at telling me when I've pushed too hard, but I've been trying to avoid that and stay healthy and well rested. A while ago I mentioned that I received some good news, and I wanted to share with everyone that I got a job! I'm not sure if I've talked about it much yet, but I wanted to wait and work a little before sharing too much. I am working for a local community in the Parks and Rec division as the marketing assistant. Which basically means I am in charge of organizing the advertising in local print and facilities. So far things have been pretty calm, as I am in between seasons, but I know it will gear up as soon as the New Year hits! Also, after working only once or twice a week at the store for a couple months, adding this job at three days a week, plus all the baking, blogging, shopping and wrapping that is going on at home - things are starting to feel a little harried! So I am trying to take a little time each day to be calm and do something fun.

Need some help relaxing this holiday season? Take a trip over to the 7 Day Push blog to find a few suggestions on how to relax. Or you can take a cue from my pup above, he has always been good at a mid-play nap! I hope your holidays are going well, and that everything is falling into place!

xox

Vegan Iced Pumpkin Cookie Mounds: With After Nine to Five

Hi there! I'm Ashley from over at After Nine To Five. Today I wanted to share one of my favorite cookie recipes: Iced Pumpkin Cookie Mounds. You can easily make it non-vegan if you'd like for those who would prefer to use regular butter and milk, but I promise it's delicious as is! I'm a big fan of pumpkin anything so these cookies are a must-have in my household every year. They're super easy and make a ton so they're perfect for any holiday party!

Cookie Ingredients:

  • 2 1/2 cups all-purpose flour
  • 1 teaspoon baking powder
  • 1 teaspoon baking soda
  • 2 1/2 teaspoons ground cinnamon
  • 1/2 teaspoon ground nutmeg
  • 1/2 cup Earth Balance butter, softened
  • 1 1/2 cups white sugar
  • 1 cup canned pumpkin puree
  • 1 teaspoon vanilla extract
Icing Ingredients:
  • 2 cups confectioners' sugar
  • 4 tablespoons soy milk
  • 1 tablespoon melted Earth Balance butter
  • 1 teaspoon vanilla extract
Preheat oven to 350 degrees.

Combine flour, baking powder, baking soda, cinnamon, and nutmeg in a medium bowl.

In a separate medium bowl, mix the 1/2 cup of butter and white sugar. Add the pumpkin and vanilla to butter mixture. Beat until creamy and mixed thoroughly. Mix in dry ingredients.

Place on cookie sheet in tablespoon sized mounds.

Bake for 15 to 20 minutes in the preheated oven. Wait for cookies to cool before icing

To Make Icing: Combine confectioners' sugar, milk, butter, and vanilla. Pour/drizzle over cooled cookies.
---------------------------------------------------------------------------------------------------------------------
Another wonderful recipe! Thanks so much Ashley, if you'd like to know a little more about Ashley, check out the Bio Page. :)

Tuesday, December 20, 2011

From the Rock: Mummering

I know it has been a rather long time since I have written a 'From the Rock' post. I am hoping to get back at it, and do it about once a month (or maybe more). I'm hoping it helps to keep me, my blog, and you lovely readers a little connected with where the inspiration for this blog originated!

If you were to visit Newfoundland this time of year, you might see some oddly dressed folks dancing, and demanding food and drink. Mummering, also known as janneying, is a traditional activity where a group of friends would dress-up, hide their identity and go from house to house in their community singing, dancing and demand food and drink until their neighbours could guess their identities all during the 12 days of Christmas.


This activity helped to create a social time that the locals could look forward to during the long cold days of winter. The tradition hasn't quite kept up with the times today, I think some people might be afraid of letting a masked person into their homes. But the province is trying to keep the traditional activity alive in the spirit of the holidays with a festival every year in December which ends in the mummers parade. Below is a short video from this year's mummers festival parade.


This year's Mummers Festival has already passed, but there is no reason why you couldn't start thinking about next years! Doesn't it look like a lot of fun!? For more information on the festival visit the website here.

I will be back tomorrow with another delicious cookie recipe, from a good blog friend. Until then, visit the Mummers Festival site, and learn a little more about a traditional Newfoundland activity!
xox

Cinnamon Roll Cookies: With Bake What Your Momma Gave You

I’m thrilled to be guest posting today. I’m not a huge fan of the holiday season myself (regular ol’ scrooge), but if there is one thing that makes it bearable, it’s the copious amounts of delicious food and baked treats. So, being part of a cookie countdown is one thing I can get behind.

I’m also happy to be back in Canada to see my friends and family, and have access to real ovens! Being in the UK doing my masters, I have only had access to a terrible little microwave oven with an “oven” function that doesn’t really cut it for baking.

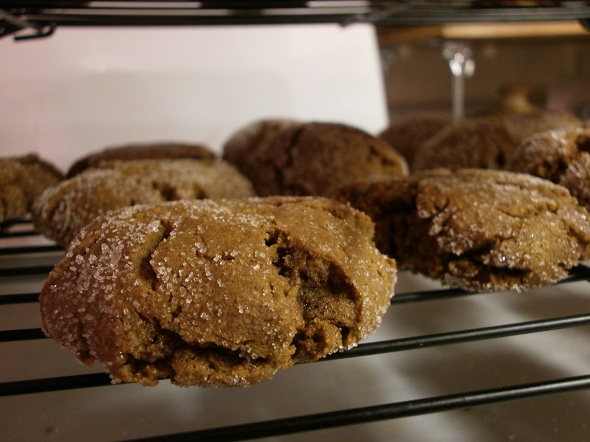
I was a little nervous I might have lost my skills but these first cookies since I got back turned out beautifully. They are wonderful and perfect for the holidays with their lovely cinnamon flavour. 


Cinnamon Roll Cookies

Makes approximately 4 dozen two inch cookies

Ingredients
2 cups of flour, plus 2 tablespoons flour
1 teaspoon cinnamon, plus 1 tablespoon for divided use
½ teaspoon baking soda
½ teaspoon salt
½ cup butter, softened, plus 3 tablespoon for divided use
¼ cup granulated sugar
¼ cup light brown sugar, plus ½ cup for divided use
1 egg yolk
¼ cup applesauce
1 tablespoon of light corn syrup
1 teaspoon vanilla
For the glaze
1/2 cup powdered sugar
2-3 tablespoon of milk

Directions
1.  Heat oven to 350 degrees F.
2.  Sift together flour, cinnamon, baking soda and salt. Set aside.
3.  In a large bowl, beat together ½ cup butter, granulated sugar and ¼ cup of brown sugar until fluffy. Add in egg yolk, applesauce, light corn syrup and vanilla and beat to combine.
4.  Fold in flour mixture until just combined. Do not over mix. Divide dough in half, wrap and refrigerate for 30 minutes (I threw mine in the freezer for about 10). Place remaining 1 tablespoon of cinnamon and ½ cup of brown sugar in a bowl and whisk to combine then set aside.
5.  Remove one wrapped dough and place between two pieces of wax paper to roll out dough to ¼ inch thickness.
6.  Using a pastry brush spread 1 1/2 tablespoon of softened butter on dough. Sprinkle half of the cinnamon and sugar mixture on top and gently press it into dough. Roll up dough, beginning with long side. Place roll seam side down on plastic wrap and cover tightly. Repeat this once more with remaining dough. Place both rolled doughs back in refrigerator for 30-45 minutes (once again, I used the freezer for about 15 – so impatient).
7.  Remove chilled roll and cut into ½ inch slices.
8.  Bake at 350 degrees F for about 10 minutes or until lightly browned, turning the sheet half way. Let cool for 2 minutes on baking sheet. Remove to wire racks to cool completely.

Glaze
1.  Sift powdered sugar and add in 1 tablespoon of milk at a time until drizzling consistency is achieved.
2.  Drizzle tops of cookies with glaze and let stand at room temperature until dried. Store at room temperature.
---------------------------------------------------------------------------------------------------------------------
Thanks Caitlin! Do those ever look good :) If you'd like to know a little more about Caitlin, hope over to her blog and say hello!

Monday, December 19, 2011

Find me Here! (with a giveaway)

Ashley has an interview of me is up on her blog today, find it here! It's a little information about me and my shop and how it all began, as well as a little giveaway package. It's the holiday season, and I'm in the giving mood! Follow the link above or click on the photo to find out more. And if you'd like something from my shop that isn't in the giveaway, feel free to use the code HOLIDAY25 for a 25% discount on anything!


Happy Holidays!
xox

Chocolate Peppermint Bark

 
¼ cup  almonds, finely chopped
8-oz     semi-sweet baking squares, chopped
6-oz     white baking chocolate squares, chopped
½ tsp   peppermint extract
            red food colouring
⅓ cup  peppermint candies, crushed

Line and 8”x8” baking pan with aluminum foil. Spread almonds in pan; set aside. Place semi-sweet chocolate in microwave safe bowl. Microwave on high-setting for 1 minute; stir until smooth. If needed, microwave an additional 10 to 15 seconds (I melted my chocolate in a bowl over a pot of hot water). Pour semi-sweet chocolate over almonds. Allow to harden.
Repeat microwave instructions for white chocolate. Stir peppermint extract into white chocolate. Pour half of chocolate into a separate bowl and tint pink. Slowly pour white and pink chocolate over semi-sweet chocolate, gently swirl with a knife. Sprinkle top with crushed peppermint candies. Chill until firm, about 1 hour.

Use foil to lift candy from pan; break into pieces. Store tightly covered at room temperature. Makes about 1 pound.
And if that isn’t simple, I don’t know what is! Well folks we are officially in the last week before Christmas. I think it’s going to be a good week, busy, but good! I think Reggie and I are finally getting our tree tonight! Perhaps we’ll have to pull out some cookies and cocoa when we get home :)
xox

Sunday, December 18, 2011

Best Ever Peanut Butter Cookies: With Polkadots, Buttons and Stripes


Hi, I’m Galia from Polkadots, Buttons, and Stripes and today I’m going to share my mother’s peanut butter cookie recipe for The. Best. Peanut. Butter. Cookies. Ever.

These cookies are the result of hours spent in front of the computer, researching and combining recipes, and finally coming up with the perfect combination: David Lebovitz’s chocolate cookie recipe as the base, with inspiration from the Magnolia Bakery Cookbook.

So, the best cookies ever? I don’t know about that, but they’re pretty darn good!

Ingredients:

2 1/2 C. flour
3/4 tsp. baking soda
1/8 tsp. salt
1 C. butter
1 C. packed light brown sugar
3/4 C. granulated sugar
1 tsp. vanilla extract
2 large eggs, at room temperature
1 C. peanut butter (chunky or smooth, your choice! I personally prefer smooth.)
1 bag (roughly 2 cups) peanut butter chips

In a small bowl, whisk together the flour, baking soda, and salt.

In a large bowl (or a stand mixer with a paddle attachment), beat together the butter, both sugars, peanut butter, and vanilla just until smooth. Beat in the eggs one at a time until fully incorporated.

Slowly stir in the flour mixture, then add the peanut butter chips and mix thoroughly.

On a lightly floured work surface, divide the dough into quarters. Shape each quarter into a log about 9 inches long, then wrap the logs in plastic wrap and refrigerate for at least 24 hours.

Position racks in the upper and lower thirds of the oven; preheat the oven to 350ºF (175ºC). Line two baking sheets with parchment paper.

Slice the logs into disks 3/4 inch (2 cm) thick. Roll each disk between your palms to form a ball, then place them 3 inches (8 cm) apart on the prepared baking sheets. Use a fork to gently flatten them.
Bake, rotating the sheets midway through baking, until the cookies are lightly browned (about 10 minutes, maybe a bit more).
Let the cookies cool on the baking sheets until firm enough to handle, then use a spatula to transfer them to a wire rack.
Makes about 48 cookies.

Note:
The dough can be stored in the refrigerator for up to a week, but can be frozen for up to a month. The baked cookies will keep well in an airtight container for up to 4 days - if they keep that long! (Ours didn’t.)

Hope you enjoy!

- Galia
-------------------------------------------------------------------------------------------------------------
Thanks so much Galia! Those sure do look good! If you'd like to know a little more about Galia or any of the other contributors, please visit the Bio Page.

Saturday, December 17, 2011

Caramel Brickle Thumbprints: With Dandelions and Lace


Hi everybody! I'm Amanda from Dandelions and Lace and I'm so excited to share my cookie recipe with you! My cookies are called Caramel Brickle Thumbprints and they are yummy! I think one of the best things about them is their size... they're small, so you won't feel guilty having a bunch! Plus, they are a nice break from all the chocolate overload this time of year (yes, I am a chocoholic myself, but chocolate overload can and does happen, folks!).


You will need:
2 1/4 cups flour
1/2 cup sugar
1 cup soft butter
1 tsp. baking powder
1 egg
1/2 tsp. vanilla
3/4 cup toffee baking chips

20 caramel squares
1/4 cup half and half


Start by mixing the flour, sugar, egg, butter and baking powder into a dough.


Add your toffee bits and mix. You may have to use your hands to knead them in completely.


Roll dough into 1 inch balls and place a couple inches apart on the cookie sheet. Then make an indention in the center of each cookie with your thumb.

Pop them in the oven at 350 degrees F for 11-14 minutes or until lightly browned.

Then melt the caramels with the half and half and mix. Pour a bit of the caramel mixture into the crater of each litle cookie. Enjoy!


I think I was able to make 60 or 65 cookies from this recipe, so it makes a lot if you keep them on the small side.


Caramel Brickle Thumbprints

Ingredients:

2 1/4 cups flour
1/2 cup sugar
1 cup soft butter
1 tsp. baking powder
1 egg
1/2 tsp. vanilla
3/4 cup toffee baking chips

20 caramel squares
1/4 cup half and half

Beat sugar, butter, vanilla and egg until light and fluffy. Add flour and baking powder.  Stir until smooth.  Add toffee chips and knead to blend.  Refrigerate for 30 minutes. Shape into 1-inch balls.  Place 2 inches apart on cookie sheet. With thumb, make imprint on center of cookie. Bake at 350 degrees F for 11-14 minutes or until lightly browned around edges and set. Immediately remove from cookie sheet and cool.   Melt 20 caramels and 1/4 cup half & half & stir until smooth. Spoon on top of cookie.

Thank you so much, Margot, for having me on your beautiful blog!
Wishing you and all your readers a wonderful holiday season! :)

Amanda
--------------------------------------------------------------------------------------------------
Thanks Amanda for your delicious recipe! That is one I will for sure have to try :) If you'd like to know a little more about Amanda please visit the Bio Page. And for previous recipes check the Cookie Countdown Page!

Friday, December 16, 2011

Demerara Sugar Shortbread


This is a tasty little number I tried for the first time last Christmastime. I think I was impatient in waiting for the shortbread to cool before removing from the pan, and the cookies broke a little, but still tasted delicious! This year I had more success. (From Canadian Living Magazine December 2009, p.165).

1 cup   unsalted butter, softened
½ cup  demerara sugar, packed
1 tbsp  granulated sugar
½ tsp   salt
2 cups  all-purpose flour, sifted
¼ tsp   baking powder
1 cup   chopped walnuts (optional, I chose to not use them)

Cream together butter, sugars and salt until light and fluffy. In a separate bowl, whisk flour with baking powder; stir into butter mixture until just combined. Stir in walnuts.

Press into parchment lined 9-inch round metal cake pan. Score to make 16-20 wedges. Using a fork, prick once or twice per wedge.


Bake in 325˚F oven until lightly browned and tester comes out clean, 45-50 minutes. Let cool in pan on wire rack for 10 minutes. Using sharp knife, cut through score lines (leaving in pan). Let cool completely. Store in an air-tight container, makes about 16-20 cookies.

Day 16! Wow, only 9 days left until Christmas!? Have you finished all your shopping? I only have a couple things yet to pick up, and most of it is even wrapped! I’m off to Ottawa this weekend to visit some lovelies (here, here and others) and I have a few delicious guest posts coming your way! Also I promise to update the Countdown page so it links to all the recipes, and if you’re looking for info on any of the contributors be sure to check out the Bio Page!

xox

Thursday, December 15, 2011

White Chocolate Cheese Ball (Day 11, a little late)


This was supposed to be posted on Sunday, but it just didn't happen :)

Alright, so today’s cookie isn’t actually a cookie. But I’m sure it’s going to be delicious! Today we have a family Christmas gathering with my dad’s brothers and their children and grandchildren. It has become pretty busy since all my cousins had kids! I am brining homemade buns (here, recipe to come), and a plate of cookies. But I thought this sweet cheese ball would be a good addition! (From Gooseberry Patch Magazine, Christmas 2009, p. 46 - including the stolen photo above).

8 oz pkg.         Cream cheese, softened
½ cup              butter, softened
½ tsp               almond extract
¾ cup              powdered sugar
1 cup               white chocolate chips
½ cup              sweetened dried cranberries, chopped
¾ cup              sliced almonds, lightly toasted
Garnish: white chocolate curls and sweetened dried cranberries

Beat together cream cheese, butter, almond extract until fluffy. Gradually beat in powdered sugar. Stir in white chocolate chips and ½ cup cherries. Cover and refrigerate until firm enough to handle, about 2 hours.
Place cream cheese mixture onto plastic wrap and shape into a ball. Refrigerate until ready to serve, or at least one hour. Roll ball in almonds before serving. Garnish top with white chocolate curls and dried cranberries, if desired. Serve with graham crackers, or other crackers more sweet than savoury.

So day 11 isn’t so bad, even though it isn’t a cookie recipe! And I do promise I will share that bun recipe, soon. I’m off to visit with family. I hope your weekend is full of pre-Christmas fun!

xox