Image Map

Thursday, December 20, 2012

Day 20: Vegan Chocolate Macaroons

Photobucket
Ok so these little sweets showed up last year, only under a different name. But this year we found out that a little girl in our family cannot eat wheat or milk, so I decided to find out if I could make these without any dairy content, and I was quite happy with the result! I tweaked the recipe a little bit, but it is practically the same :)

2 cups  sugar
½ cup   cocoa powder
½ cup   vegan-butter, or margarine
½ cup   almond milk
3 cups  quick cooking oats
1 cup    unsweetened coconut
1 tsp     vanilla

In a heavy saucepan over medium heat combine sugar, cocoa powder, milk and butter. Bring to a rolling boil, and maintain boil for 5 minutes. Remove from heat, add oats and coconut and mix until combined.
Spoon on to parchment lined cookie sheet, and transfer to fridge to cool until firm.
And there you have it. Another delicious Christmas treat! And this one is Wheat and Dairy free! If you would like to also make them gluten free, instead of regular oats you can use gluten free oats, brown rice flakes, quinoa flakes, buckwheat flakes or any other gluten free grain as long as it is in it's flake form. If you want to try the gluten free version I would recommend letting the chocolate mixture cool a little before adding the flakes.

Are you done your shopping and wrapping yet? (Also, sorry I didn't actually get this posted on time).

Happy Baking!
xox

Wednesday, December 19, 2012

Day 19: Candy Cane Cheesecake

I don't even know how to introduce this. I loved it! Reggie had a potluck a while back at work and I decided to make this, feeling that it was a festive choice. And after the potluck some came home, and I happily got to try it. Now I will caution that when getting your cheesecake 'bath' ready, please be careful not to let the water over the top of the foil. I think a little bit of water made its way into the base of the pan and my crust was a little soggy. But that didn't stop me from eating the entire rest of the dessert that was brought home.

So if you like mint, and cheesecake, I bet you would enjoy this little number!
 Photobucket

From Canadian Living, can be found on the website here.

Ingredients
2 pkg cream cheese, softened
3/4 cup granulated sugar
3 eggs
2 cups sour cream
1 tbsp lemon juice
1 tsp peppermint extract
Crust:
1-1/2 cups chocolate wafer crumbs
1/4 cup butter, melted
Topping:
1 cup sour cream
2 tbsp granulated sugar
1/2 tsp vanilla
2 tbsp coarsely crushed candy canes

Directions
Grease bottom of 9-inch springform pan; line side with parchment paper. Set pan on large square of heavy-duty foil; press up side of pan. Set aside.

Crust: In bowl, stir crumbs with butter until moistened; press into prepared pan. Bake in centre of 350°F oven until firm, 10 minutes. Let cool on rack.

In large bowl, beat cheese until fluffy. Beat in sugar until smooth; beat in eggs, 1 at a time. Beat in sour cream, lemon juice and peppermint extract. Pour over crust.

Set springform pan in larger pan; pour enough hot water into larger pan to come 1 inch up sides.

Bake cheesecake in centre of 325°F oven until shine disappears and edge is set yet centre still jiggles slightly, about 1 hour.

Topping: Combine sour cream, sugar and vanilla; spread over cheesecake. Bake for 10 minutes. Turn off oven. Let stand in oven for 1 hour.

Remove cheesecake from water and transfer to rack; remove foil and let cool. Cover and refrigerate until set, about 2 hours. (Make-ahead: Refrigerate for up to 2 days or overwrap in heavy-duty foil and freeze for up to 2 weeks.) To serve, sift candy to remove powder; sprinkle pieces around edge.


Alternatively, if you are like Reggie and aren't big on the mint flavour, swap out the mint extract for vanilla and use berries or chocolate flakes as topping!

6 days, we are 6 days away from Pip's first Christmas! I am starting to get excited!

Happy Baking
xox


Tuesday, December 18, 2012

Day 18: Chocolate Hazelnut Tassies

(I'm not sure what happened, but a couple scheduled posts, didn't post... enjoy.)

So this is a rather delicious treat that is a little less sweet than some of the other baked goods this time of year. I love how cute they look when finished. For sure these will be in our gifting line-up this year!
Photobucket

This recipe is from Canadian Living Magazine, and can be found on the website here.

Ingredients

1/2 cup butter, softened
4 oz cream cheese, softened
1-1/4 cups all-purpose flour
1/2 cup finely chopped hazelnuts
Ganache Filling:
4 oz semisweet chocolate or bittersweet chocolate, chopped
1/2 cup whipping cream
2 tsp hazelnut liqueur, (optional, I opted not to use it)
12 whole hazelnuts, (approx)
Photobucket
Preparation

1. In large bowl, beat butter with cheese. Stir in flour and hazelnuts until combined. Place 1 tbsp into each greased mini-muffin cup. Press evenly over bottom and side of each cup. Freeze for 1 hour or until solid. (Make-ahead: Wrap in heavy-duty foil and freeze for up to 2 weeks.) 
2. Bake in centre of 325°F oven for 30 minutes or until golden. Let cool in pan on rack.
3. Ganache Filling: Meanwhile, place chocolate in bowl. In small saucepan, bring cream, and liqueur (if using) to boil; pour over chocolate and whisk until smooth. Pour into shells.
Cut each hazelnut in half; place in centre of each tart. Let stand for about 30 minutes or until ganache is firm. (Make-ahead: Refrigerate in airtight container for up to 5 days.)
Photobucket 
Day 18, I can't believe it! Where has the time gone? In less than a week Santa will be coming! :D

Happy Baking
xox
 

Monday, December 17, 2012

Day 17: Snickerdoodles with Megan

I know what you're thinking, we've already seen this recipe! Well this is from a different guest baker, and it was just too cute to pass up. Take a look and see how Megan and her little helper make these tasty treats :)
----------------------------------------------------------
Merry Christmas!! 
My name is Megan from {And here's to you, Mrs. Robinson}. I'm really excited to share one of my favorite cookie recipes with you all today for Margot's Christmas Cookie Countdown. I always loved making Snickerdoodles with my mom and being her special helper to roll the dough in the cinnamon & sugar. Now I love that I can pass on the tradition with my son and we can make those memories together.  

This recipe is adapted from the Lion House Cookbook.

INGREDIENTS:

1/2 cup granulated sugar
1 1/4 tsp. cinnamon
1 cup butter, softened
2 1/2 cups sugar
4 eggs
1 tsp. vanilla
2 1/2 T. water
6 cups flour
2 tsp. cream of tartar
1 tsp. baking soda
1/2 tsp. salt

+ plus one cute little helper! 

DIRECTIONS: 
1. Preheat oven to 350 degrees
2. In medium bowl, mix 1/2 cup sugar and cinnamon; set aside. 
3. In large mixing bowl, combine butter and 2 1/2 cups sugar until light and fluffy.
4. Add eggs, vanilla, and water; beat until fluffy. 
5. Add flour, cream of tartar, baking soda, and salt, turning mixer on and off in quick bursts at low speed until flour is nearly blended in. Continue mixing at medium speed until well mixed.


 6. Make sure your helper approves of the dough

7. Shape dough by rounded tablespoonfuls & roll in cinnamon-sugar mixture. 
8. Place on cookie sheet lined with parchment paper and bake for 9 to 10 minutes or until golden brown. Makes 5 dozen 3-inch cookies.
And makes for one happy boy! 

Thank you for letting me share one of my favorite cookie recipes with you today!
I hope you all have a wonderful holiday season filled with lots of love, memories, and sugary treats. :)


Sunday, December 16, 2012

Day 16: Simple Crusty Bread with Ada

Happy Holidays Newfoundlander at Heart readers! I'm Ada from Of Woods and Words and today I'm sharing the simplest, most beautiful and delicious yeast bread recipe ever.

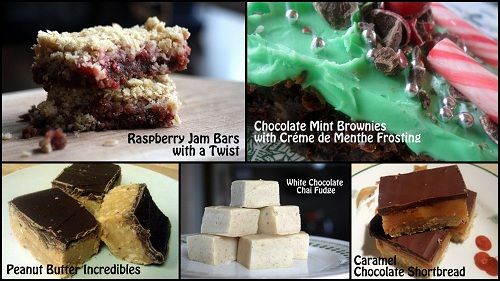
I love cookies as much as the next person, but it's easy to overwhelm yourself with sugar this time of year. For Margot's cookie countdown, I wanted to share an alternative to all the sweet stuff and give you a great gift idea that could be given in lieu of (or with) a cookie platter.

I found this recipe on Pinterest (and the recipe was originally published in the New York Times) and I have to admit that I had my apprehensions about it. (We've all had our fair share of Pinterest failures, am I right?) I was pleasantly surprised to find that this recipe really is amazingly easy and delicious.

The only special piece of equipment you'll need is a cast iron Dutch oven pot or any lidded casserole dish. You bake the bread inside the heated pot to trick the bread into thinking it's in a fancy, schmancy bread oven. The result is this beautiful, super professional looking loaf:

Photobucket
Crusty Bread
3 cups unbleached all purpose flour
1 3/4 teaspoons salt (or less, depending on taste)
1/2 teaspoon yeast
1 1/2 cup water
In a large mixing bowl, whisk together flour, salt and yeast. Add water and mix until a shaggy mixture forms. Cover bowl with plastic wrap and set aside for 12 - 18 hours. Heat oven to 450 degrees and place a cast iron pot with a lid in the oven and heat the pot for 30 minutes. Meanwhile, pour dough onto a heavily floured surface and shape into a ball.Cover with plastic wrap and let set while the pot is heating. Remove hot pot from the oven and drop in the dough. Cover and return to oven for 25 minutes. After 25 minutes remove the lid and bake an additional 10 minutes. Remove bread from oven and place on a cooling rack to cool.

A couple notes:
  • Lidded pot needs to be at least 3 quarts - mine is 5 quarts and it works great!
  • You can substitute up to a cup of whole wheat flour for some of the all purpose flour. You can also add in flavorings to the dough to make the bread extra special.
  • Forget everything you know about baking bread and just follow the directions as written above. No need to proof the yeast or knead the bread.
  • The recipe link at the top of this post has great step-by-step photos.
  • Do not grease the pot - if there's some grease in the pot from the last time you used it, the pot make smoke, so consider this a good test for your smoke detectors!
I haven't tried flavoring the bread yet, but here are some flavor combinations I plan to try out in the future:
  • Bleu cheese and walnut
  • Orange zest, craisins, and pecans
  • Dark chocolate chunks, dried cherries, and almonds
  • Golden raisins, dried apricots, and hazelnuts
  • Shredded cheddar cheese and bacon
  • Parmesan cheese, sun-dried tomatoes, and basil

You add the flavorings right to the flour mixture before you stir in the water. In general, I'd say you should limit yourself to about 1 1/4 cup of flavorings so you don't overwhelm the dough.

The beauty of this bread is that it only requires about 5 total minutes of hands-on time (seriously) and it's so versatile. The plain bread makes wonderful grilled cheese sandwiches and excellent toast.

Photobucket

How perfect would a loaf of this bread be for a co-worker or neighbor's holiday present? Just wrap in a pretty flour sack towel with a simple ribbon bow, pair with a jar of homemade jam and an elegant spoon.
------------------------------------------------------------------------------------
Does that ever look tasty! A little cinnamon and a few raisins might make this a delicious Christmas Morning treat :) Have you linked up any of your recipes yet? Scroll down to find the Friday link-up.

xox
 

Saturday, December 15, 2012

Pip Update: 7 Months

From the eyes of a sweet little Pipster...

Mama and I got it together this time to post this update on time! I am 7 months old today, on my Grandpa's birthday (Happy Birthday Grandpa!)! We get to go to Auntie Crystal's this evening for supper, which is always fun because I love watching my older cousins run around. And exciting news, I have a younger cousin! He was born on November 27th, so he's still just little wee, but in not too long he and I will be tearing up the town together!
 
I am a big boy, I can sit up all by myself. And I love to sit on the ground close to my big brother. We play with our toys together. I have been getting up a lot at night lately, and mama thinks I have more teeth coming. I know you're tired mama, but I can't help wanting to have some cuddles to make me feel better - please don't be upset, I promise to sleep better soon.
Things have been really busy around our house, mama went to her first craft show, and now she's working on finishing up Christmas presents. She says she's working on something for me, but she hasn't even let me have a peak yet! I'm excited about my first Christmas, everyone assures me I will love it when I get older. But as long as I get to visit with all my family I'm sure this year will be great too!

I'm ready for Christmas, my outfit is washed and ready to wear - I hope everyone else is ready too!

xox
Pip

Friday, December 14, 2012

Meet the people behind the recipes!

Are you enjoying all these delicious recipes? I thought it would be a good idea to share the faces behind some of the guest baking, and where you can find them. I am so grateful to these lovely ladies for helping me out in the baking department. I know even from last year it is tough to bake all those goods on your own! Please hop on over to their blogs to find out even more about who they are and what they do :)
--------------------------------------------------

Hello Newfoundlander at Heart readers! I’m Ada. I blog about my life in the woods of northern Minnesota at my blog, Of Woods and Words. When I’m not busy working as a freelance writer, I’m probably either knitting something (my Etsy shop, Yes Sir, Yes Sir! features my hand knit items) or cooking up something lovely to eat in the kitchen. One of my favorite holiday traditions is baking and I’m so happy to be a part of Margot’s Christmas Cookie Countdown!


I bet you're all looking at that picture and thinking 'am I really going to try a recipe from this girl?' Let me introduce myself. I'm Helen and I blog over at Eat.Enjoy.Live. I love books, cooking, blogging, crafting, basically anything ending in 'ing'. I like to put a tiny ounce of crazy into my life now and again too. Come over the say hello. You'll find recipes, crafts, and lifestyle posts, as well as joining the crazy but wonderful new family that I seem to have acquired.

Blog :: Facebook :: Twitter :: Google+ :: Instagram


I'm Sara from Creating Purple Fire, a blog where I write about all the nerdy/crafty/mommy bits of my life along with my journey to discover how to create a passionate life around them! You can find my blog here or follow all my ridiculousness on Twitter and Facebook.


Hi, I'm Lynn from Turnips 2 Tangerines. You can always find me in my Little Kitchen in the Big Woods of Northern WI making family favorites.

Blog  ::  Facebook ::  Twitter :: Pinterest 


I am Chrissy and I blog over at Whimsical Poppysmic. My family and I reside in the south of Germany again after returning in August 2011 from 3 years in Chicago. I blog about life, my family and my passions - such as knitting, I would love to have you, why don't you come over and say hi! Hugs xxx


Day 14: Squares Link-Up

Day 12 Chocolate Mint Brownies // Day 13 White Chocolate Chai Fudge

Thursday, December 13, 2012

Day 13: White Chocolate Chai Fudge

So I originally thought this recipe would go next week, as part of the 'other' category, but I just couldn't wait to try it. And then once I made it, I just couldn't wait to share it - it qualifies as a square, right? If you like creamy fudge and chai then you will LOVE this recipe! And it is super simple :)
 
This recipe is from Canadian Living Magazine, December 2012. And can be found on their website, here.
Ingredients
1 lb white chocolate, chopped
1 can sweetened condensed milk
1/2 tsp each cinnamon & allspice
1/4 tsp ground cardamom
1 1/2 cups chopped cashews (I totally forgot about this until I was enjoying a piece and saw the bag of cashews on the table - still delicious!)
Directions
1. In bowl over saucepan of hot (not boiling) water, heat chocolate with condensed milk, cinnamon, allspice and cardamom, stirring often, until smooth, about 5 minutes. Remove from heat. Stir in cashews.
2. Scrape into parchment paper–lined 9-inch square cake pan; smooth top. Refrigerate until firm, about 3 hours.
3. Transfer to cutting board; remove paper. Cut into squares. 
Day 13 might be my favourite so far, but I am overly fond of chai. Be sure to check in again tomorrow. There will be another link-up for this week's creations. And I'll be introducing you to some the guest bakers :)

Happy Baking
xox

Wednesday, December 12, 2012

Day 12: Chocolate Mint Brownies with Crème de Menthe Frosting


From: Turnips 2 Tangerines

Prep:15 mins                Cook: 35-45 mins                Serves: 8-10


Ingredients
¾ cup Hershey’s Cocoa
⅔ cup butter, melted and divided
2 cups sugar
1-1/2 cups flour
¼ teaspoon salt
½ teaspoon baking soda
½ cup boiling water
2 eggs
1 teaspoon vanilla extract
½ cup mini chocolate chips
½ cup coarsely chopped mint m&m’s, plus extra for garnish
⅓ cup chopped pecans
2 Tablespoons chocolate fudge ice cream topping
 
Directions
  1. Heat oven to 350º. Grease 13 x 9 x 2 baking dish
  2. Stir together cocoa and baking soda in a large bowl; Stir in ⅓ cup butter.
  3. Add water; stir until mixture thickens.
  4. Stir in sugar, eggs, and remaining ⅓ c butter. Stir until smooth.
  5. Add flour, vanilla extract and salt; Stir until well blended.
  6. Stir in  mini chips, mint m&m’s, pecans and fudge topping. 
  7. Spread in prepared pan.
  8. Bake at 350º for 35-45 mins or until toothpick inserted near the middle comes out clean.
  9. Remove from oven, cool on wire rack. Cool completely.
  10. Frost with Créme dé Ménthe Frosting and  Garnish with  Chopped M&M’s
Créme dé Ménthe Frosting:
  1. ¼ cup (1/2 stick) butter, softened
  2. 3-1/2 cups confectioners’ sugar
  3. ¼ cup green créme dé ménthe liqueur
  4. ¼ cup milk, or as needed
Cream all ingredients together until creamy.
Spread on cooled brownies
Sprinkle reserved chopped mint m&m’s over  frosted brownies
Note: for a nonalcoholic version, omit liqueur and use peppermint extract

------------------------------------------------------------------

Do those ever look tasty! I might have to give them a try, but with everything going on they might have to wait until after Christmas, when things settle down a little. There is another square recipe coming at ya tomorrow, and then another link-up on Friday. And you still have time to link-up your cookie recipes here.

xox 

Tuesday, December 11, 2012

Day 11: Raspberry Jam Bars with a Twist

A while back I made some chocolate peanut butter cookies, without a recipe. Now I don't usually use a recipe for a standard cookie like that, and I they always turn out great. With this time being the exception. For some reason they were a little dry, and lacking in the chocolate department. So after a few days when there were still quite a few left, I knew they needed a new purpose, and these bars were born!
 
Ingredients

Base
1 cup crumbled, no-good chocolate peanut butter cookies (lol, or chocolate wafers)
1/4 cup butter, melted
Filling
Raspberry Jam, or any flavour of your liking
Topping
1 1/2 cups quick cooking oats
1/2 cup flour
1/4 cup brown sugar
3/4 cup butter, softened
2-3 shakes of cinnamon

Directions
1. Preheat oven to 350˚F. Grease at 9x9 baking pan, set aside.
2. Mash your no-good cookies into crumbs (it's rather satisfying when you can destroy a baked good gone wrong), and combine with melted butter until moist.
3. Press into the bottom of greased pan, and bake on centre rack for about 10 minutes. Allow to cool slightly.
4. Meanwhile, combine oats, flour, brown sugar and cinnamon. Using pastry blender cut in butter a little at a time until coarse crumbs form (you might need a little more or less than called for).
5. Once cooled spread jam over base, and cover completely with oat topping.
6. Bake for 25-30mins until topping is golden brown, and jam is bubbling. Transfer to a wire rack to cool. Cut into squares and finally enjoy those no-good cookies! :)
And there you have it! Day 11, a simple yet delicious recipe, and a perfect way to use up one of your other baking adventures gone wrong. I can't believe it is already December 11th, it's going to be the 25th before we know it. I better get to work on the Christmas presents I am making for everyone :)

xox

Monday, December 10, 2012

Day 10: Peanut Butter Incredibles with Sara

Greetings from Creating Purple Fire! I'm Sara Carbaugh and I am super thrilled to be sharing one of my favorite Christmas treats with you today, Peanut Butter Incredibles! My mom used to make these every year along with all of our other Christmas goodies and they were definitely something I looked forward to each year! I remember as a kid sneaking into the kitchen after my mom had made these and trying to rearrange all the bars in the Tupperware box so it didn't look like I had taken one or two... possibly three as a snack! Now that I have my own little family I was excited to make these for the first time this year and I was pleasantly surprised at how easy they were to make!  

Ingredients:
1/3 lb Graham cracker crumbs, finely ground
1/3 lb (about 1 stick and 2 3/4 T) Butter or margerine, melted
1 lb (about 3 1/2 cups) Confectioners sugar sifted
1 1/2 cups Peanut butter
2 Cups (12 oz package) Semi-sweet chocolate chips    

Directions:
Combine crumbs, butter, sugar and peanut butter and cut with a pastry blender to bring it all together. Then when it gets too thick to blend, use your clean hands to really pull the rest of it together. You should end up with a thick ball of peanut buttery goodness. Press the mixture into a 8x12" pan.
Melt the chocolate chips in the microwave in 30 second bursts (stirring in between bursts) until the chocolate is smooth. Spread the chocolate over the peanut butter mixture to make an even coating.
Refrigerate the bars until they are firm (30 minutes to an hour). Take the pan out and let it warm up a bit before cutting them into little square bars.
That's it! Super easy and ridiculously good! I hope you try these and I hope you love them as much as my family does!

Sunday, December 9, 2012

Day 9: Caramel Chocolate Shortbread with Helen

Hi Newfoundlander at Heart readers, I'm Helen from Eat.Enjoy.Live. When Margot asked for suggestions for her Christmas cookie countdown I just knew this one would be a winner. OK technically its a bar, but we love them just as much as cookies, right? These are sticky  gooey and oh so sweet; kind perfect in my book. Cut them up into small squares, place on a gorgeous plate, and invite people round for a festival dessert cocktail party.

Just a warning: The original recipe serves 12, but the portions were far to big, eventually I managed to make it serve 40 (they turn out like Petit-fours). They take like 3 hours to make, but are well worth it!


Caramel Chocolate Shortbread
Recipe passed down from my Grandmother


Serves - 40


Ingredients:
For Shortbread:
115g unsalted butter
175g plain flour
55g golden caster sugar

Filling and topping:
200g butter
115g golden caster sugar
3 tablespoons golden syrup
400g condensed milk
200g plain chocolate, broken into pieces


Method:
Preheat the oven to gas mark 4. Grease and line the base of a 9-inch square shallow cake tin.
Place the butter, flour and sugar in a food processor and process until they begin to bind together. Press the mixture over the base of the prepared tin. Bake in the preheated oven for 20-25 minutes, or until golden.


Meanwhile, make the filling. Place the butter, sugar, golden syrup and condensed milk in a saucepan and heat gently until the sugar had dissolved. Bring to the boil and simmer for 6-8 minutes, stirring consistently, until the mixture becomes very thick. Pour the filling over the base and chill in the fridge until firm.


Place the chocolate in a heatproof bowl, set the bowl over a saucepan of gently simmering water and heat until melted. Spread the melted chocolate over the filling. Leave to set, then cut into slices.


I hope you all have a wonderful Christmas and New Year!